
Email Notification
Configuration
Configure your Art2link ESB deployment to send notification emails through your own Office 365 tenant. This is a one-time setup that takes about 10 minutes.
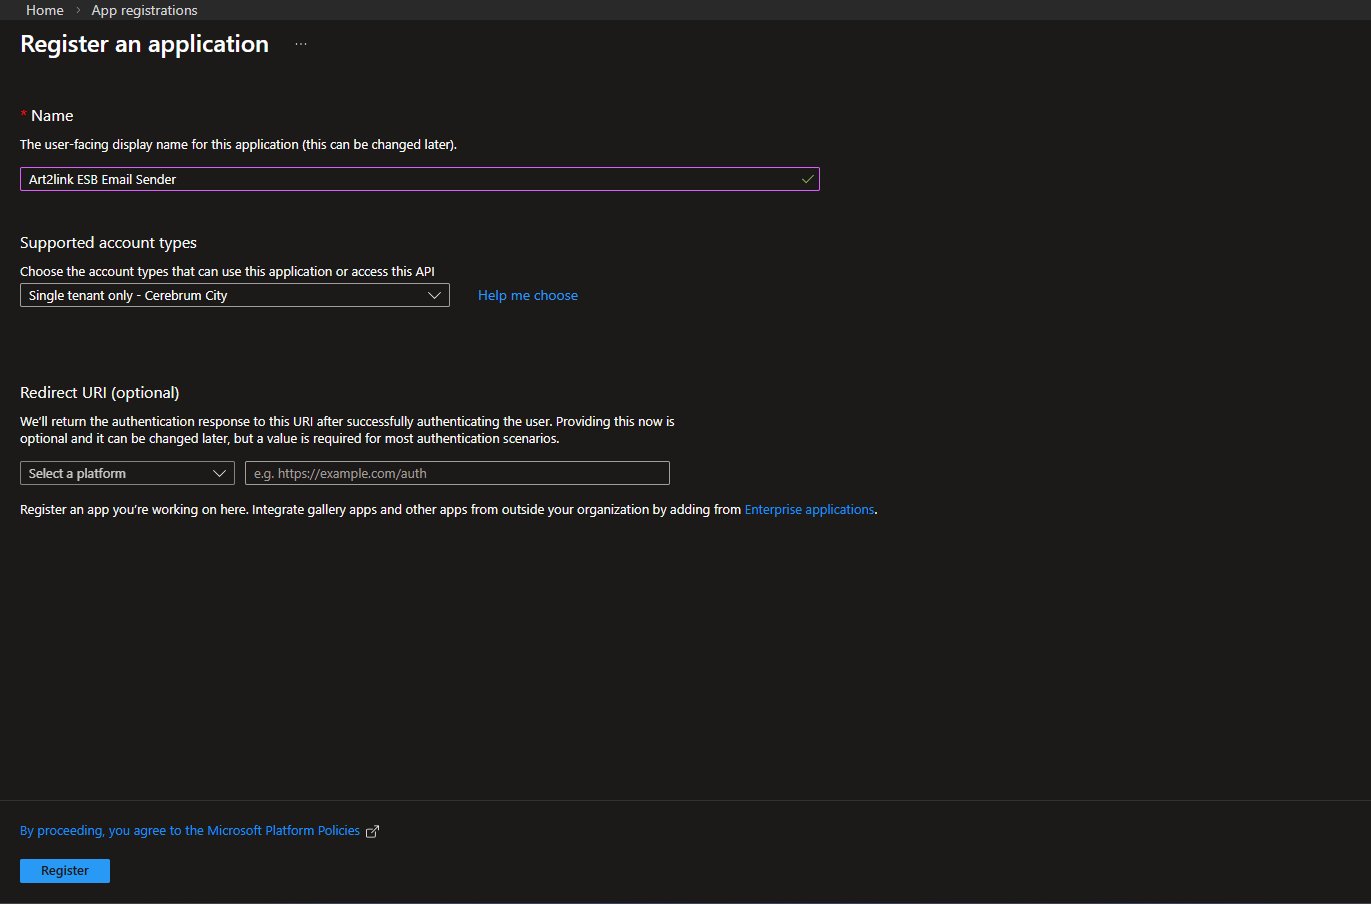
Go to entra.microsoft.com and sign in. In the left menu, expand the Identity section, then select Applications › App registrations. Click New registration in the top toolbar.
Fill in the registration form with the following values:
| Field | Value |
|---|---|
| Name | Something descriptive, e.g. Art2link ESB Email Sender |
| Supported account types | Accounts in this organizational directory only (Single tenant) |
| Redirect URI | Leave blank |
Click Register to create the application.
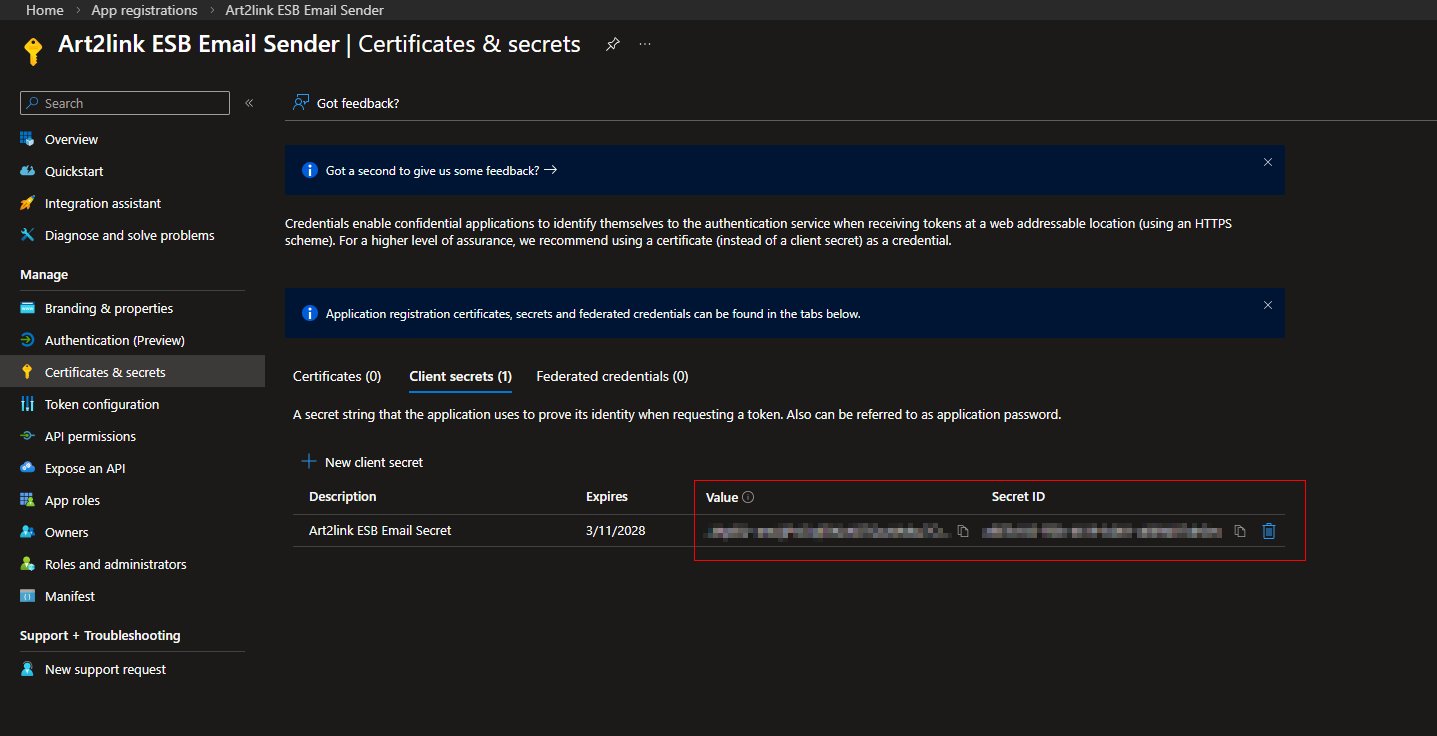
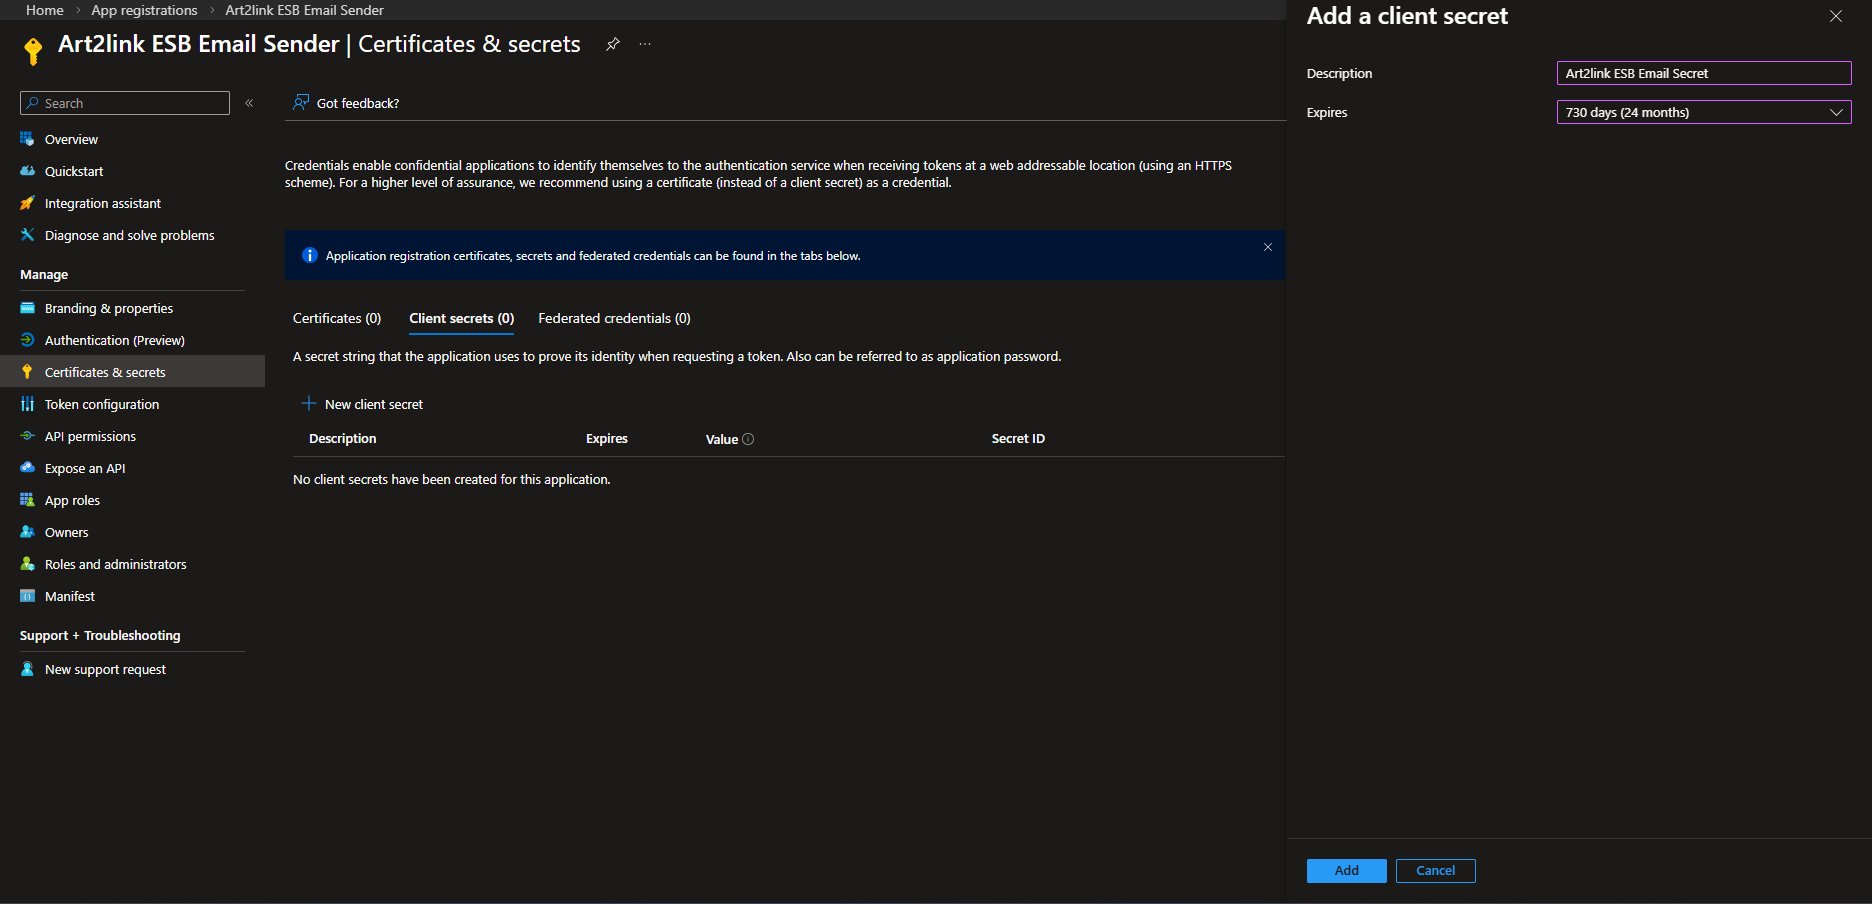
In the left menu of your app registration, select Certificates & secrets. Click New client secret to open the panel on the right.
Give the secret a meaningful description (e.g. Art2link ESB Email Secret) and choose an expiry period. 730 days (24 months) is a reasonable default. Click Add.
Once the secret is created it appears in the list. Copy the Value immediately — this is the only time it will be shown in full. After you navigate away it will be masked and cannot be recovered.
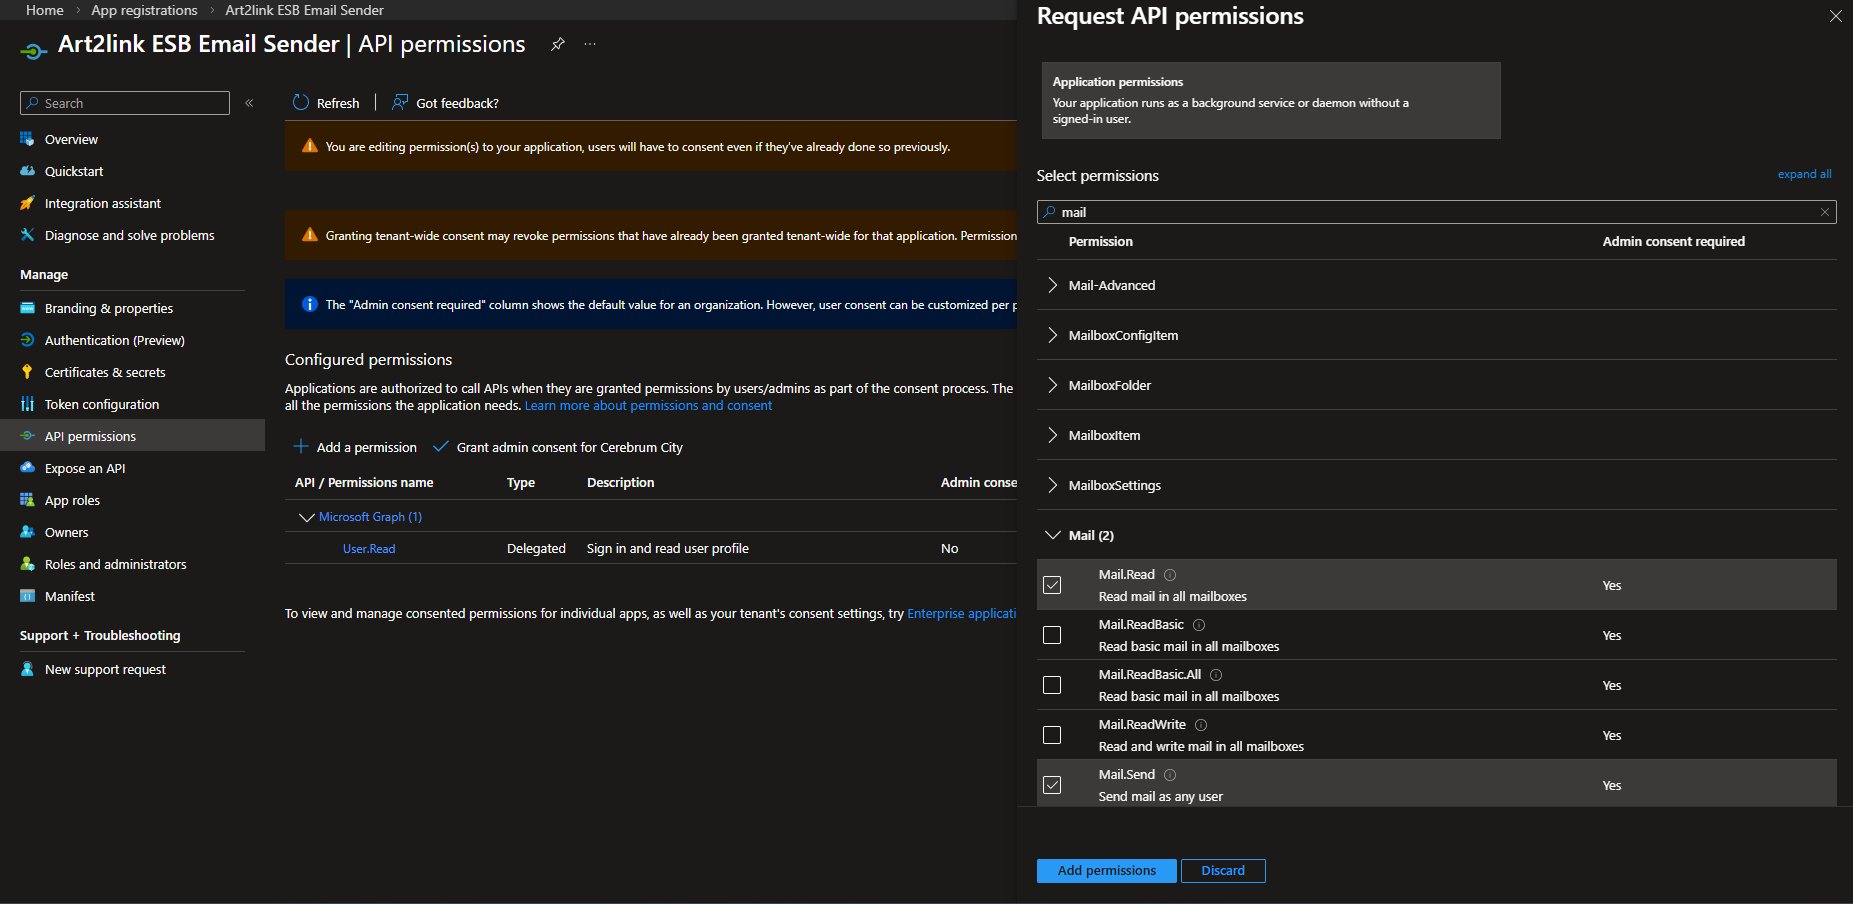
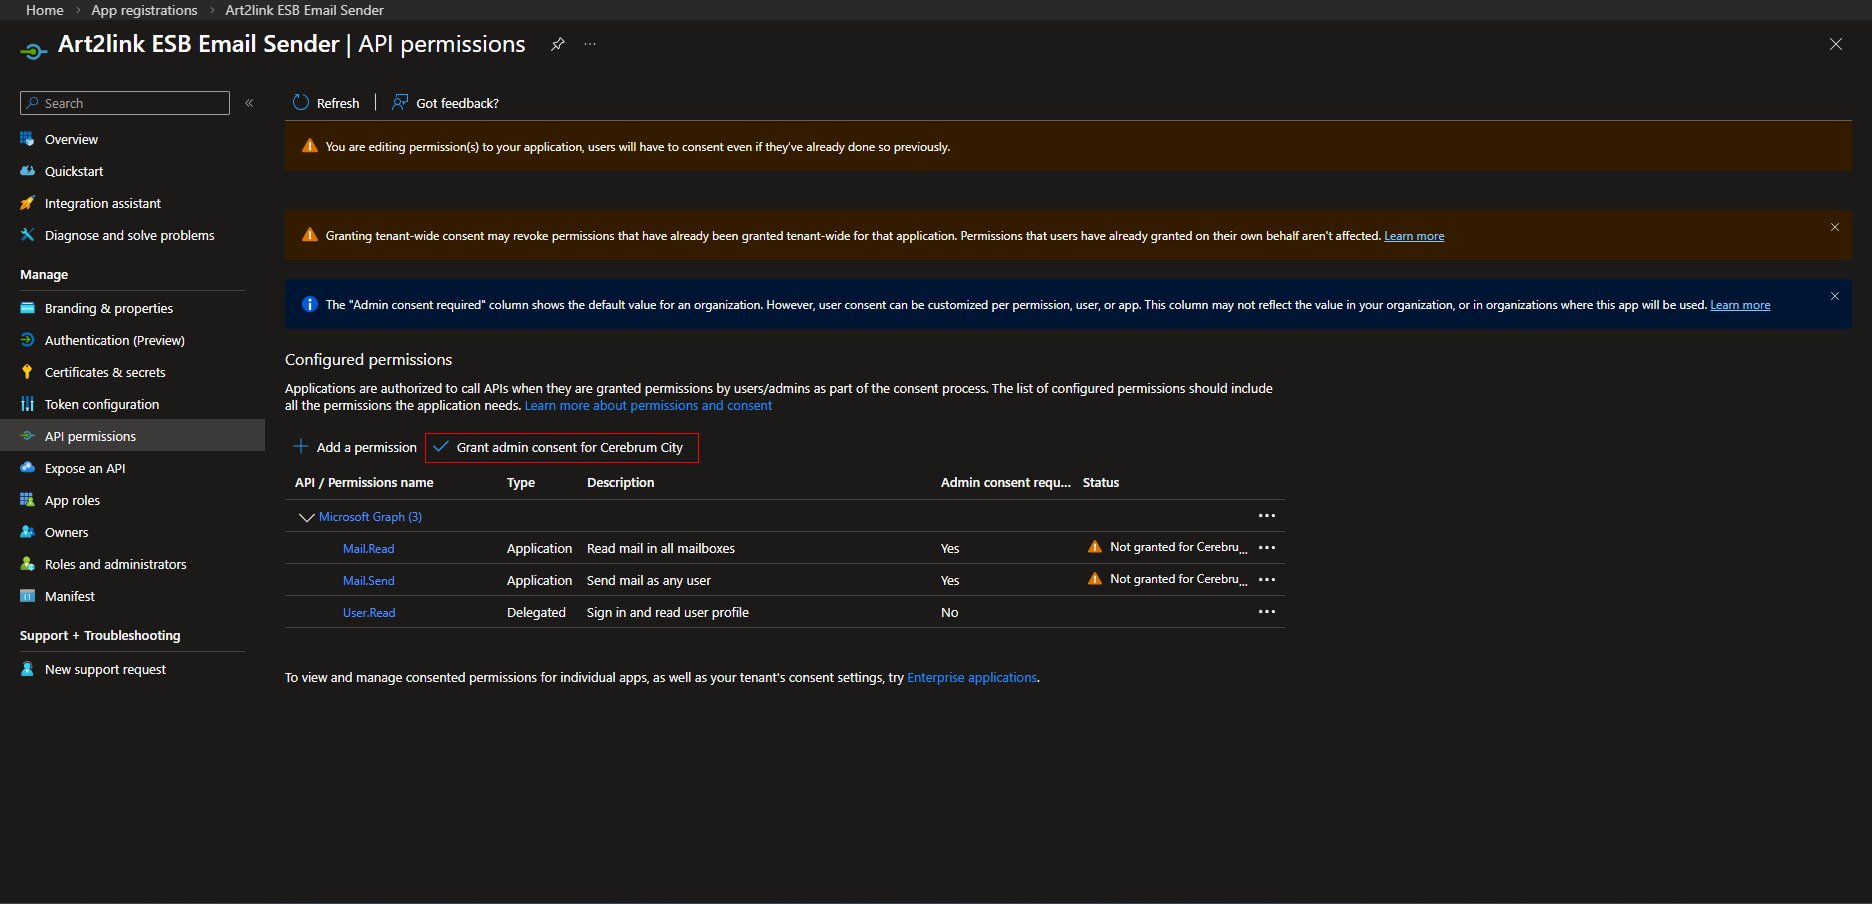
In the left menu, select API permissions. Click Add a permission. In the panel that opens, select Microsoft Graph — it is the first tile in the top row.
Select Application permissions (not Delegated). In the search box type Mail. Locate the Mail section in the results, expand it, and check the following two permissions:
| Permission | Purpose |
|---|---|
| Mail.Send | Allows Art2link ESB to send notification emails as any user in the tenant |
| Mail.Read | Allows Art2link ESB to verify mailbox access and support future delivery confirmation features |
Click Add permissions to save.
Back on the API permissions page, you will see ⚠ Not granted warnings next to both permissions. You must now grant tenant-wide admin consent. Click Grant admin consent for [your tenant name] and confirm the prompt.
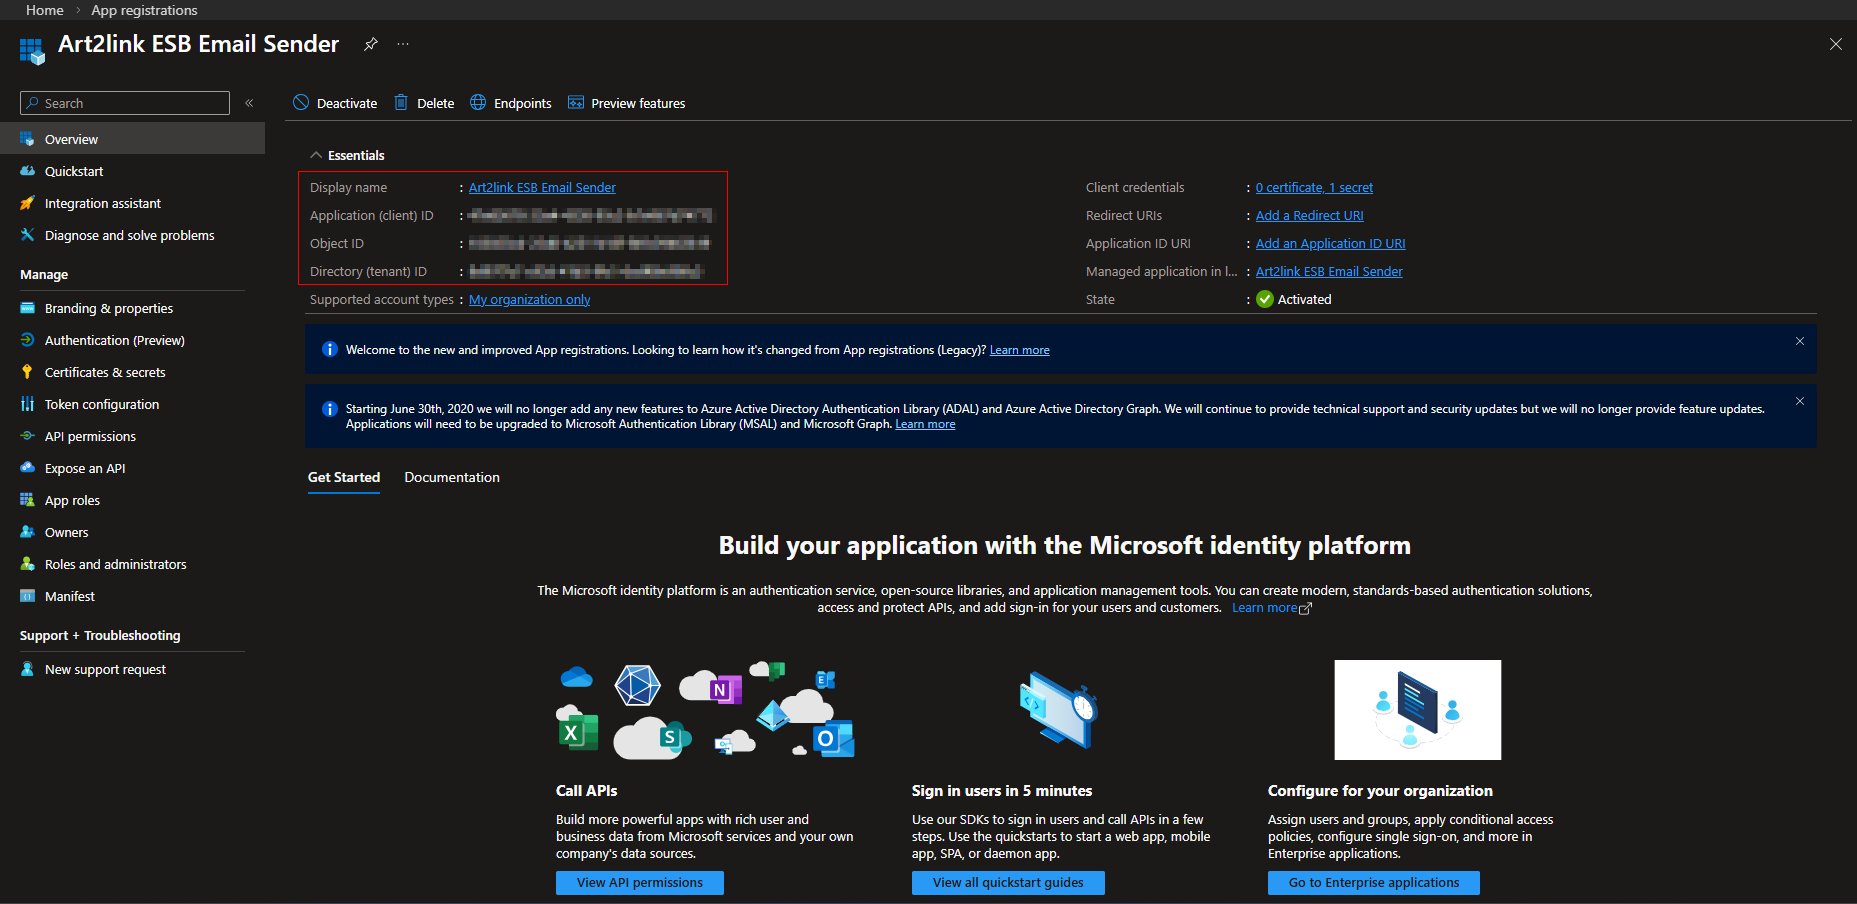
You need two more values from the app registration before switching over to Art2link ESB. In the left menu select Overview. In the Essentials section, locate and copy:
| Value | Where to find it |
|---|---|
| Application (client) ID | Essentials section, left column |
| Directory (tenant) ID | Essentials section, left column, below the Client ID |
Now open Art2link ESB and navigate to Settings. In the email configuration section, populate the fields with the values you have collected:
| Art2link ESB Field | Value |
|---|---|
| Tenant ID | Directory (tenant) ID from the Overview |
| Client ID | Application (client) ID from the Overview |
| Client Secret | The Value you copied in Step 2 |
| From | A valid email address in your Office 365 tenant (e.g. Art2linkESB@yourOrg.com) |
Save your settings and verify the configuration by creating an Activity Notification in Art2link ESB. If everything is configured correctly the notification email will be delivered.
Configuration complete
Art2link ESB is now connected to your Office 365 tenant and ready to send notification emails. Remember to renew your client secret before it expires.