
 During the Integration process, many of our clients ask us to send automated email responses at different stages of the message life cycle. Regardless of being an EDI, HL7, SWIFT or any other message, being able to send automatic email confirmations is a well known BizTalk capability, and if you don’t here is a link you’ll find useful to start using this option. Here
With the continuous growth of Azure many companies are moving their mail systems to the cloud, taking advantage of the benefits Azure can give them but facing new challenges to adapt their systems to this new technology. Many integration teams are struggling to properly configure their BizTalk Servers from the old SMTP server to this new Office 365 mail accounts. So the question to ask would be:
How do I perform an Office 365 SMTP Adapter Configuration for BizTalk Server?
We’ve compiled the solution we use into a step by step guide you can follow to solve this problem.
If you think the solution below is helpful and you’d like us to keep doing this research work, share it with your friends.
Step By Step Guide
-
Install and Configure the SMTP Service
Generally, this means that each node server from your farm will have its own configuration, and being BizTalk in this case, will point to itself. This helps for cases when the server goes down, and no other server is consuming this service. We do this because BizTalk Server’s SMTP adapter doesn’t provide support for TLS encryption.
-
Install SMTP Server
Go to Add Roles and Features and install it:
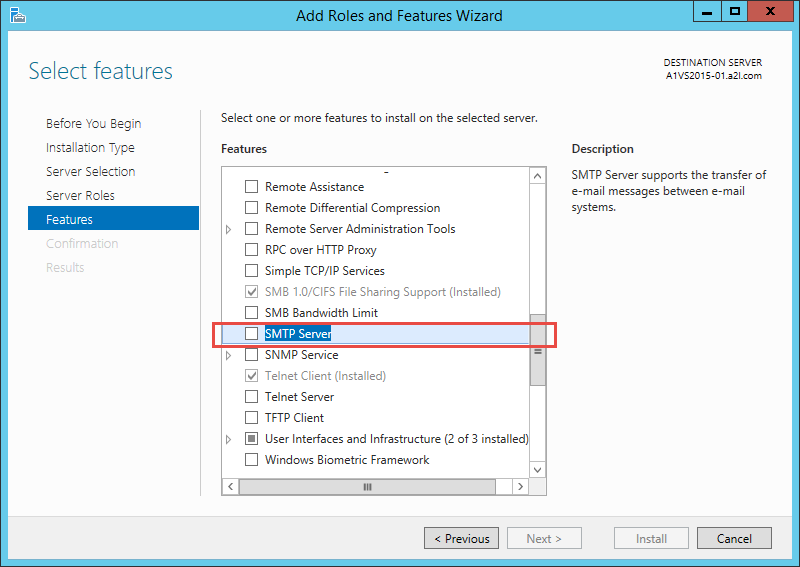
Make sure you add all its dependencies and proceed to install.
-
Configure the SMTP Server Relay
Open: Internet Information Services (IIS) 6.0 Manager
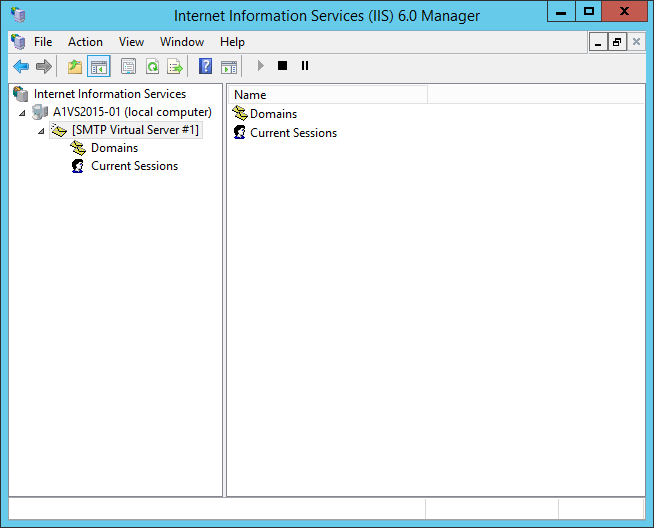
Right click on the [SMTP Virtual Server #1] node and click on Properties
Select the Access tab and click on Relay. Change selection to “All except the list below”
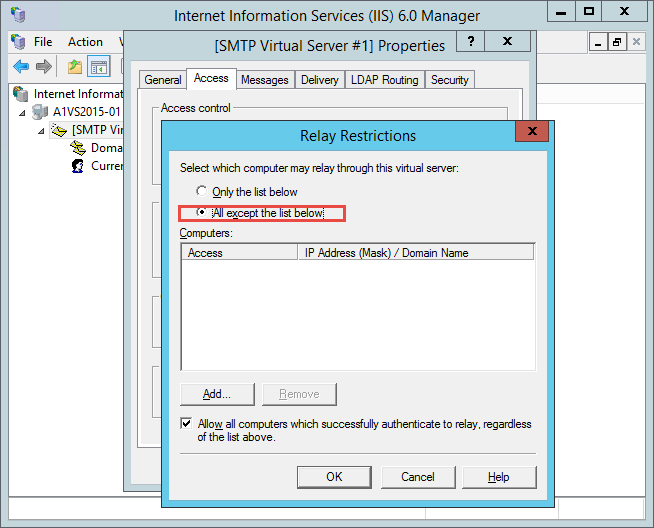
Click OK.
Switch to Delivery Tab and select Outbound Security
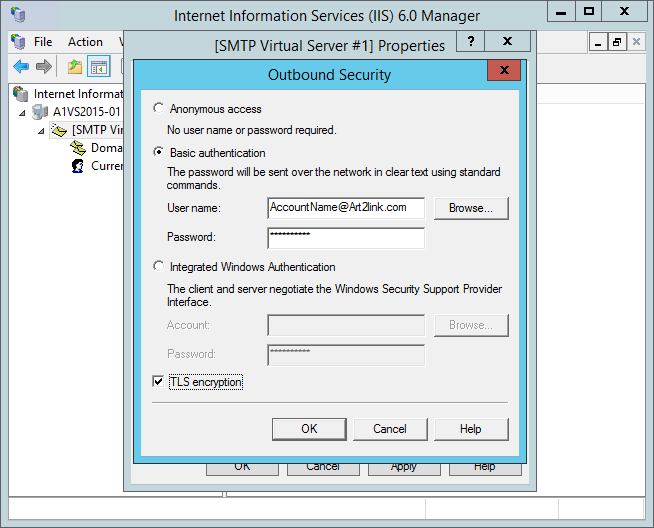
Select Basic authentication, enter your Office 365 Email and password, and check the TLS encryption option,
Click OK.
Click on Outbound connections, and change the TCP port to 587.
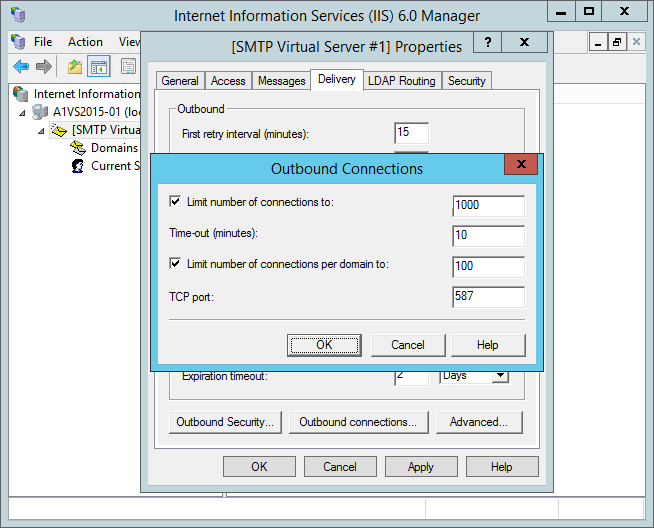
Click OK.
Now click on Advanced, in the Smart host box, enter: smtp.office365.com
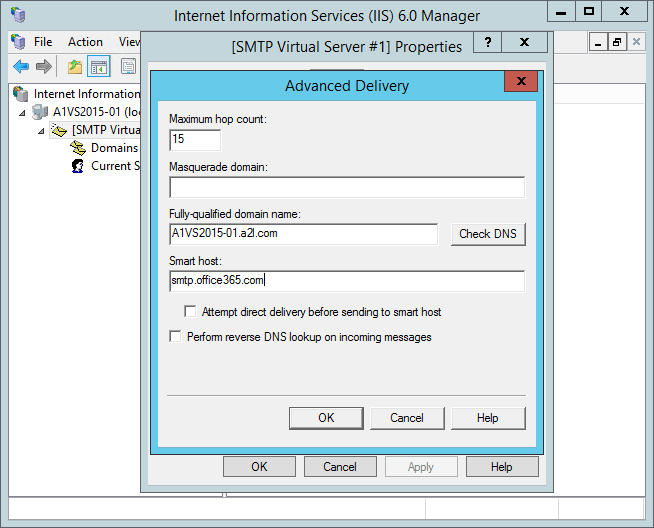
Click OK.
Switch to the Security tab, and add the Host Instance Account that you will be using to run the BizTalk SMTP Adapter.
Click OK.
Make sure everything is saved and acknowledged.
Under Services, locate Simple Mail transfer Protocol (SMTP) service. Right click and select Properties.
Change its Startup type to Automatic, and click OK.
Right click on it, and restart it.
-
Configuring the BizTalk SMTP Adapter
If you need to configure all BizTalk SMTP adapters to use the same SMTP Relay, then you can perform this configuration at the Adapter level (send handler), otherwise you can overwrite it at the Port level each time.
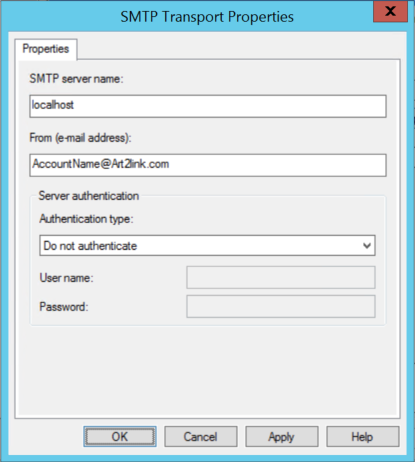
Notice that we use localhost because the SMTP Relay was configured on this same server, otherwise, you point to the SMTP Relay server where you configured this earlier.
At this moment you should be able to use the BizTalk SMTP Adapter to send emails using an Office 365 Account.